Print an Excel 2010 spreadsheet with page numbers
In this lesson, we will cover how to print an Excel spreadsheet with page numbers on each page. Excel has changed a lot over the years, but one thing that hasn't changed is the way that you insert page numbers into a spreadsheet. Unfortunately, Excel 2010 does not make it easy to find the options for doing this. This lesson covers the basics of inserting page numbers as well as providing an overview of some more advanced options.
Printing standard Excel page numbers
To print your Excel 2010 spreadsheet with page numbers on each page, follow these steps. Note that you won't see the results of these steps until you either print or preview the spreadsheet for printing:
- Select the worksheet you want to print
- Choose the Insert menu. This will display the Header and Footer Tools toolbar in the ribbon menu.

- The display will change to show the spreadsheet in Page Layout mode. The Header and Footer Tools toolbar will be displayed:

- You can click the Header or Footer buttons to insert from a range of pre-set options for the top and/or bottom of the page.
- These include page numbers as well as other standard document options such as file name, worksheet name, print date and other.
- You can choose each in turn to see a preview of your spreadsheet with the selected options.
- By default, the Header/Footer view will open to edit the Header. You can use the Navigation buttons to Go to Header or Go to Footer.
- You can use the other buttons to insert specific Header and Footer elements.
- Page Number
- Number of pages (this will change when you print to reflect the actual number of pages being printed)
- Current date (i.e. the date when the spreadsheet is printed - good for version control)
- Current time (i.e. the time when the spreadsheet is printed - also good for version control)
- File path (i.e. where on your hard drive the file is saved)
- File name (the name of the current spreadsheet file)
- Sheet name (the name of the current worksheet)
- Picture (e.g. a logo).
- Format Picture (when a picture has been inserted and selected, you can format the picture)
- You can also choose some additional options, such as:
- Whether the first page in the printout should have a different header and footer to subsequent pages
- Whether odd and even pages should be formatted differently. For example, if you are printing your spreadsheet double-sided and plan to bind it, you may want the page numbers to appear on the outside edge of each page.
- Whether to align the header/footer with the page margins on the page.
- Whether to scale the header/footer when you scale the spreadsheet for printing.
Inserting Page Numbers - alternative option
The following steps are another way to set up page numbering. You may find this method useful if you are used to older versions of Microsoft Excel.
- Choose the Page Layout menu. This will display the Page Layout toolbar in the ribbon menu.
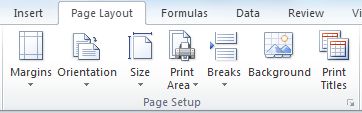
- Click the arrow in the bottom right corner of the Page Setup section of the Page Layout toolbar (see the image above).
- This will display the Page Setup dialog box. From here, click the Header/Footer tab. Note that another way to access this dialog box is to choose File > Print and then select Page Setup.

- You can now click either the Header or Footer option to choose from several standard options for printing page numbers (as well as other options at the top or bottom of each sheet.
- For example, if you choose Page 1 of ?, then Excel will print the page number and the total number of pages in the printout in the centre each page (e.g. Page 2 of 7).
- If you choose Confidential, 12/03/2012, Page 1, Excel will print Confidential on the left side of each page, the current date in the centre of each page, and the page number on the right of each page.
- These options are available for both the Header and Footer.
Once you have chosen your header/footer options to include page numbers (as well as other things), you can now print yoru spreadsheet to see the results. Choosing Print Preview will allow you to view your changes before you print.
Customizing Excel page numbers - alternative option.
To customize the page numbering in your Excel spreadsheet using options not available in the standard options described above, follow these steps. These steps are mostly the same in older versions of Excel, as well as Excel for Mac:
- Decide whether you want to print your spreadsheet with Different odd and even pages. This is useful if you are printing your spreadsheet onto double-sided sheets for binding. Otherwise you can probably ignore it.
- Decide if you want a Different first page. This is useful if the first page will be a cover sheet and you don't want to print the page number on that page (although note that this will not change how page numbers are assigned).
- Click either Customer Header or Custom Footer. The screenshot below assumes you chose both options described in the points above.

- You can now click in each region of the header (Left, Center, Right) and enter a custom value.
- You can enter text directly into each region.
- You can insert variables using the buttons shown above. Float your mouse over each button to see its function. Each button is described below in the order shown above:
- Format the text in each section. This displays the standard text formatting dialog box.
- Insert the page number - &[Page]
- Insert the number of pages in the document - &[Pages]
- Insert the date (this will be the date when the spreadsheet is printed or previewed) - &[Date]
- Insert the time (similarly, this will be the time when the spreadsheet is printed or previewed) - &[Time]
- Insert the File Path (i.e. the path on your hard drive where the file is located - &[Path]
- Insert the name of the file being printed - &[File]
- Insert the name of the worksheet being printed - &[Tab]
- Insert Picture - this could be a logo, or a watermark. Clicking this button will allow to choose a picture from your hard drive to insert.
- Format Picture - once you have chosen a picture, you can use the standard Microsoft Office image formatting tools to format the picture you have uploaded.
- Note that if you chose the options for different odd/even pages, or different first page, you can set these values using the additional tabs shown in the screenshot above.
Join our mailing list
Our Comment Policy.
We welcome your comments and questions about this lesson. We don't welcome spam. Our readers get a lot of value out of the comments and answers on our lessons and spam hurts that experience. Our spam filter is pretty good at stopping bots from posting spam, and our admins are quick to delete spam that does get through. We know that bots don't read messages like this, but there are people out there who manually post spam. I repeat - we delete all spam, and if we see repeated posts from a given IP address, we'll block the IP address. So don't waste your time, or ours. One other point to note - if you post a link in your comment, it will automatically be deleted.
I have a workbook with multiple worksheets that I all need numbered separately. For Example, the first worksheet I have labeled A - &[Page] and has 15 pages. It works fine for the first tab, but when I start on my next worksheet, I have it B - &[Page]. The pages start at 16 because its the total pages in the workbook. How can I make the second tab start back with page 1?