How to create and send an email campaign in Mailchimp
This lesson provides a detailed step-by-step guide to creating an email campaign in Mailchimp. It focuses on creating a Regular campaign and shows you the steps you need to take, and the best practices you should use, from starting a new email campaign all the way through to actually sending your email.
Whether you're new to Mailchimp or an existing user who wants to make sure that you're following all the right steps when setting up your email campaigns in Mailchimp, this tutorial is for you.
Unlike other lessons on our site, this training will take longer than five minutes to complete. In fact, it's actually a collection of short individual lessons, all together on a single page so you don't have to click through multiple pages to get all the information you need from deciding which type of campaign you should send, through to clicking the Send button to push your new email campaign out into the world. Along the way, we'll include recommendations and best practices so that by the end, you'll be safe in the knowledge that you're "doing Mailchimp right".
Lesson Summary
This section provides you with a list of the lessons in this page with quick links to help you jump directly to a specific lesson.
- What is an email campaign in Mailchimp?
- How to Start a new Regular Email Campaign
- Add Recipients for your new campaign
- Define a Segment containing subscribers who will receive your campaign
- Personalize the "To" Field in your campaign
- Customize the From field
- Write the subject line of your email campaign
- Choose a template for your campaign's email
- Design your email and write the content
- Check if your email is ready to send
- Sharing your campaign with a Campaign Link
- Adding a Social Post to your Campaign
- Set up tracking for your email campaign
- Testing your email campaign before sending to your audience
- Send your email campaign
What is an email campaign in Mailchimp?
An email campaign is any email that you send from Mailchimp to your subscribers.
There are several different types of email campaign in Mailchimp, including the following:
- A Regular campaign is the fastest option and allows you to send a formatted email with images, buttons and videos.
- A Plain Text email is just that - no formatting, text or images. Some people prefer this, although it is a lot less common today than it used to be.
- An Automated is used when you want to set up an email in advance and have Mailchimp send it automatically when certain circumstances occur, e.g. sending a welcome email when someone joins your list via your website.
- An A/B Test allows you to test two different versions of an email campaign on a small group of subscribers before sending the winner to the rest of the recipients.
This lesson will focus on creating a Regular campaign. We'll cover the other Mailchimp email campaign types in future lessons.
Important: Campaigns are Audience-specific - you cannot send one campaign to multiple audiences. To do this, you will need to create a new version of your campaign for each audience. This is one reason why it is a good idea to have just one Audience in your account.
How to Start a new Regular Email Campaign
- Click the Create button link at the top right of your Mailchimp screen.
- Choose Email from the list of campaign types.

- Choose Regular from the list of Email types.
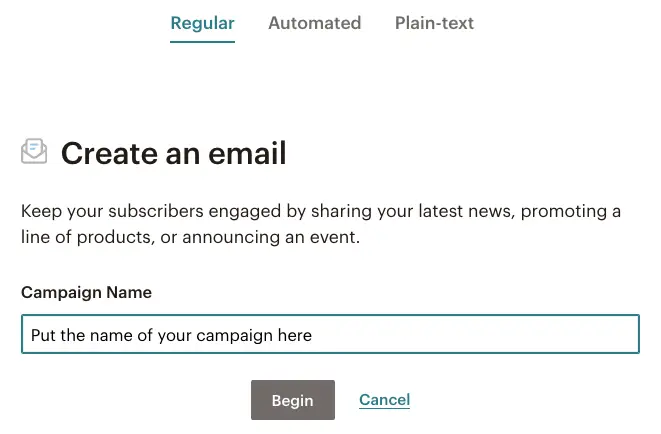
- Enter the name of your new campaign. Only you will see this. Make it descriptive so you'll know what it is at glance later on
- Click Begin
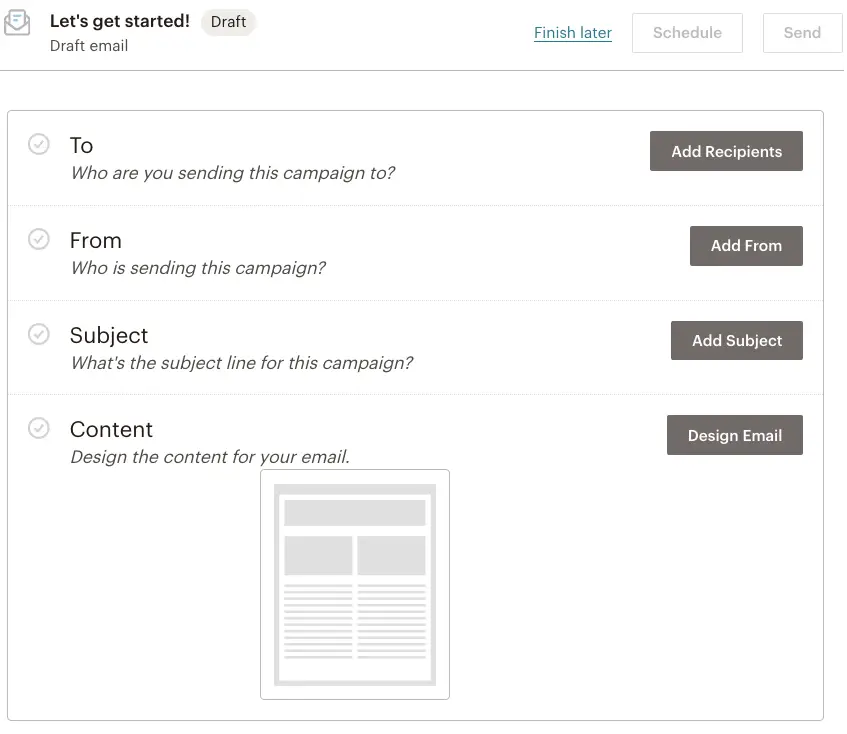
You will then be taken to the campaign creation page. This page contains everything you need to create and send your new campaign:
- Who you are sending this campaign to.
- Who is sending this campaign, i.e. who is it from.
- What is the subject for this campaign, i.e. what is the title of the email
- What is the content for your campaign.
- How do you want to share this campaign once you have sent it
- What are the tracking and other settings for this campaign.
The following lessons will go into more detail in each of these areas.
Add Recipients for your new campaign (recommended step)
Recipients are the people who will receive your campaign. You can send your campaign to all subscribers, or to a selection of those subscribers. We will look at both options in this lesson, although we strongly recommend that each campaign you create should be targeted at a specific subset, or segment of your audience.
- To choose the recipients of your email, click Add Recipients.
- Then, choose which Audience you are sending this campaign to.
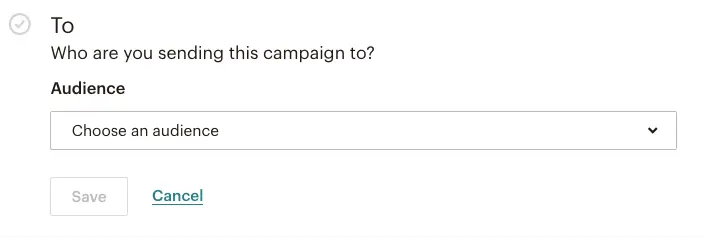
- Once you choose an audience, you will see a new option, Group or New Segment. It will be set to the default option of All subscribers in audience. You can accept this default or choose from a range of options for choosing a subset of your audience.

Recommendation: It is best practice to send each campaign to a subset of your audience, rather than to All Subscribers. This helps increase your open and click-through rates, and reduces the number of people who unsubscribe after receiving your campaigns.
To change the default selection of All subscribers in audience, click the dropdown field to see other options:
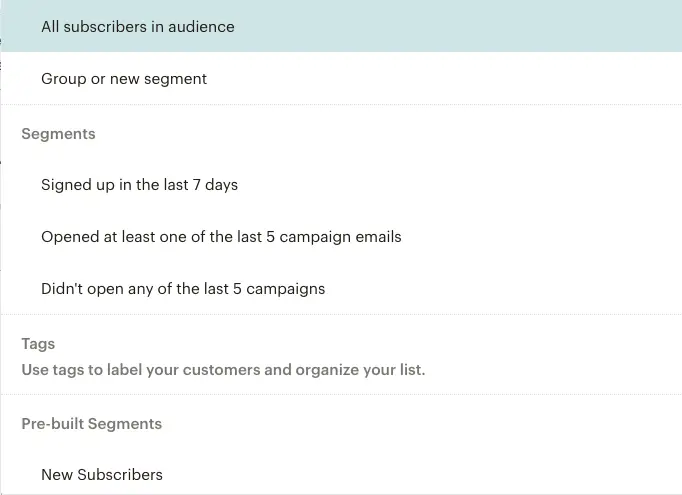
The segmentation options available to you are listed below:
- You can choose subscribers in a specific Group (sometimes also known as an Interest Group). You can only choose from Groups you have already created.
- You can create a new segment. This is useful because you don't need to stop creating this campaign to create a segment. However, note that the segment you create here will not be saved to use elsewhere.
- You can choose subscribers with one or more Tags that you already have assigned to one or more of your subscribers. In this example, we haven't defined any tags yet.
- You can paste in a list of email addresses from this audience that should receive this email, or that should not receive this email. Note that any emails you paste here that are not already subscribers in this audience will not receive this campaign.
- You can choose a custom segment that you have already created. All of the segments you have created will be available to choose from.
- You can choose from one of the Pre-built Segments that Mailchimp has automatically created based on the activity of your subscribers. These include segments such as New Subscribers, Active Subscribers. The list you see will depend on the plan level you are on, and whether you have connected your Mailchimp account to an ecommerce store such as Shopify or WooCommerce.
Important: Note that you can only send Regular email campaigns to Subscribers because Regular campaigns are considered to be marketing emails.
Define a Segment containing subscribers who will receive your campaign (recommended step)
In this section, we will look at creating a new segment for this campaign (option #2 option from the section above). This is an optional step - you can choose one of the other options or a different segment if you already have one that you want to use.
Important: The segment you create here will only be used for this campaign - it will not be saved for you to use again later.
To create a new segment, follow these steps:
- Choose Group or New Segment from the Segment or Tag dropdown.
- You will see a new panel where you can start to define your segment. Notice the additional option to Paste Emails, which was discussed in option #3 in the previous section.

- You can now add up to 5 different conditions, or rules, that will be used to decide which subscribers in your audience should receive this campaign.
- The example shown above includes a single condition: Date Added is after the last campaign was sent.
- In other words, this segment would only include those subscribers who were added to your Audience after January 23 2018.
- You can also choose whether subscribers must meet all of those conditions or any of those conditions in order to be included in this segment.
- If you choose Any, your conditions will be evaluated as Condition 1 OR Condition 2. Anyone meeting either condition will be included in the segment. All others will be excluded.
- If you choose All, your conditions will be evaluated as Condition 1 AND Condition 2. Only those subscribers meeting all conditions will be included in the segment.
- Each time you add a condition, you can click Update Recipient Count to check how many subscribers are included in the segment.
- If the number is zero, check that your conditions are not mutually exclusive, i.e. it is possible for at least one subscriber to meet both conditions.
- This is a common mistake when creating a new segment, even for experienced Mailchimp users!
- Here is an example of two conditions that are mutually exclusive, because it is not possible for someone to have opened one of the last 5 campaigns since they were added after the last campaign was sent:
- Date Added is after the last campaign was sent AND
- Campaign Activity opened Any of the Last 5 Campaigns
- Once you have defined the rules for your new segment, you can continue with the the next step in the process of setting up your campaign.
As noted earlier, this is an optional step. If you have reached #5 in this list and cannot work out the correct rules to create the segment you want, you continue on to the next section and come back to your custom segment later.
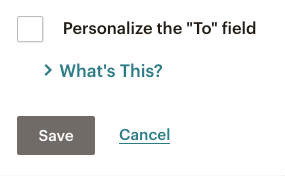
Personalize the "To" Field in your campaign (optional step)
This option is part of the "To" section of your campaign. It is shown as the last option, below the Audience section. It is optional but recommended.
The To field in an email campaign contains the recipient's email address and is sometimes shown to the recipient of the email depending on the email software they are using. Normally this would look like this:
Personalizing this is a good idea since it may avoid spam filters in the recipients email service and makes it feel more personal to the recipient. When you do this, the To field will look something like this:
- To:Sam Jones
Once you enable this checkbox you will see a new Merge tag field.
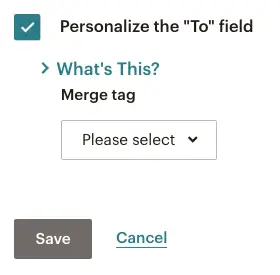
Merge tags are used to personalize content in your campaigns by allowing you to insert information from the individual subscriber's contact record, such as their name, into email content. Mailchimp provides a number of standard merge tags. You can also define your own merge tags.
The Merge tag options include the following:
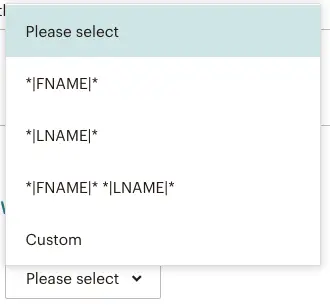
Here is what each of these options will add to the To: field for each recipient in this campaign:
- *|FNAME|* (insert the recipient's first name)
- *|LNAME|* (insert the recipient's last name)
- *|FNAME|* *|LNAME|* (insert the recipients first and last names - this is the option chosen for the Sam Jones option above)
- Custom (this will allow you to insert any of the available merge fields from your another field from your contact's record to use.)
If you select the Custom option, you will need to know the tags that you want to use - Mailchimp will not provide a list to choose from. The fields available to use will contain the standard Mailchimp merge fields plus any custom fields you have defined. They should be inserted in the format shown above for the first name and last name fields. Click here to view a list of all of the standard merge tags with explanations of each one.
Important: you should test this feature before using it. In particular, make sure that you have values stored for each subscriber for each tag before using it. If you use a merge tag, such as *|FNAME|* and do not have a first name value for every subscriber, this part of the To field will be blank.
Finally, now you have finished choosing the Recipients for your campaign and have defined any personalizations for the To field, you're ready to click Save and move on to the next step in the process of creating your email campaign.
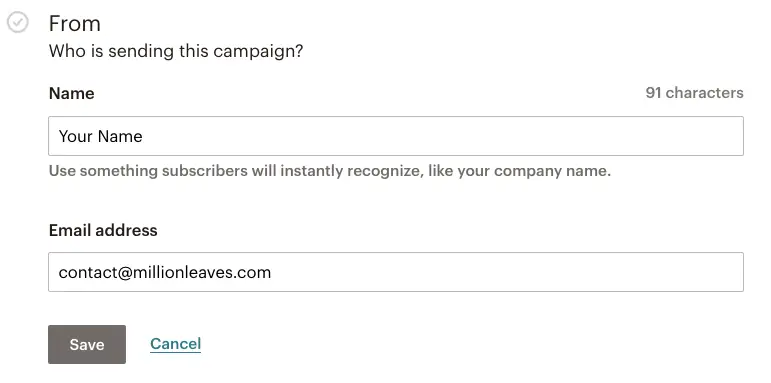
Customize the From: field
When you receive an email from someone, it is useful to know who has sent the email - it helps you to decide if the sender is someone you know, and whether you trust them.
- For example, what happens when you get an email from someone called "Sam"? You might know one Sam, many people called Sam, or nobody called Sam.
- More useful would be if the email came from "Sam Jones". At least they've told you who they are.
- Even better might be "Sam Jones from ABC Company". That way you know who they are and where they are from. The company name in particular will help you work out if this is an email you were expected or subscribed to. However, it can be weird if you get an email from someone at that company who you have never dealt with before.
- Another option is to specify your company or organisation name in the From field. This can be good if you trust that company, but it can also feel a little impersonal, especially if you're used to dealing with people who work there.
The default for a new email campaign is defined in your Audience settings, and controls the sender's Name and Email fields. This ensures consistency across multiple email campaigns. However, you can change these settings for an individual campaign if you wish to. This could be useful if you want different email campaigns to appear to have come from different people.
To change the From field, click Edit From and change the values to match your requirementsm, then click Save. In most cases you will not need to change this, since the defaults should be OK to use as they are.
If you decide to do this, there are two important rules you should follow:
- You must have values in both fields - otherwise your campaign will not be sent.
- You must use an email address from a verified domain. If you registered your account using the email address contact@millionleaves.com, you cannot change this to contact@millionleaves.co.uk unless you have verified that you are allowed to send emails from that domain as well.
Recommendation: Include your company or organization name in the From field, e.g. Sam Jones from ABC Company. This helps remind the recipient who the email is from - they may not remember the name of the person at your organization they have dealt with in the past. I regularly receive emails from people I don't recognize. I usually discard these emails. if they had included the organization name in the From field, it would have been easier to connect the email with the sending organization, and more likely that I would have opened the email.
Write the subject line of your email campaign
The subject line of your email campaign is a critical part of its success. Many people will only open your email if the subject line is interesting to them and/or gives them a reason to.
To write the subject line for your email, click Add Subject (it will say Edit Subject if you already added one).

You will then see two fields:
- Subject
- Preview Text

The Subject of your email is what will appear to your readers as the title of the email. This is one of the most important things you need to write when creating a new campaign because it is the first they see in their inbox. If people don't like your email subject line, or it doesn't appeal to them, they might not open your email.
Note: You will see the character count for the Subject and Preview text fields in the above example. Mailchimp allows you to have 150 characters in each field.
Here are some recommendations for writing good subject lines:
- Make it interesting. Hint: Weekly Newsletter #245 is not an interesting title, no matter how accurate it is.
- Make it relevant to your audience. This is easier if you're sending this campaign to a segment of your audience, rather than your whole list.
- Personalize it for the recipient using merge tags. For example, you can use *|FNAME|* to include the reader's first name in the title, such as "Mary, do we have a deal for you"
- Be specific about what’s in the email
- Keep it short – around 5-6 words long (or not - you don't have to search hard to find articles recommending the exact opposite!)
- Make it time sensitive, to create a sense of urgency. But don't do this with every email - people quickly tire of this tactic if you do it too much.
- Be careful about relying on Emoji's to convey your subject. Not all email software supports emojis, so not everyone will understand your cool subject line if it relies on emojis to make your point.
- Consider upgrading to one of Mailchimp's paid plans, which include an feature called A/B Testing. This includes the option to test up to three different subject lines on a portion of your campaign's recipients and will then use the winning subject line in the email that is sent to the remaining recipients.
The Preview Text is something that will be displayed in some email software, but not all. It provides the recipient with a short summary of the email so they can decide whether they want to open it. Think of it as a sales pitch that can convince someone to read your email. Completing this field is optional, but recommended. If you don't write something here, the preview text will consist of the first few words of your email. I recommend you experiment with the text in this field to see what works and what doesn't.
Choose a template for your campaign's email
Once you've written your subject line and preview text, it's time to actually write your email campaign.
Start by clicking Design Email. This will open the Campaign Builder which consists of two steps:
- Choose a template
- Design your email using that template
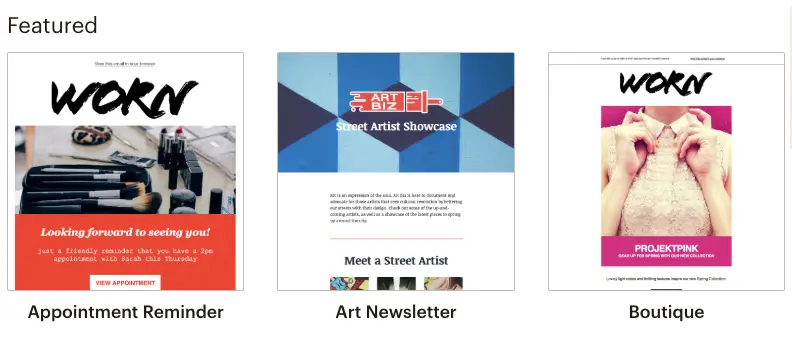
On the Select a Template page you'll see the following options, although you may need to upgrade your Mailchimp plan to access all of them:
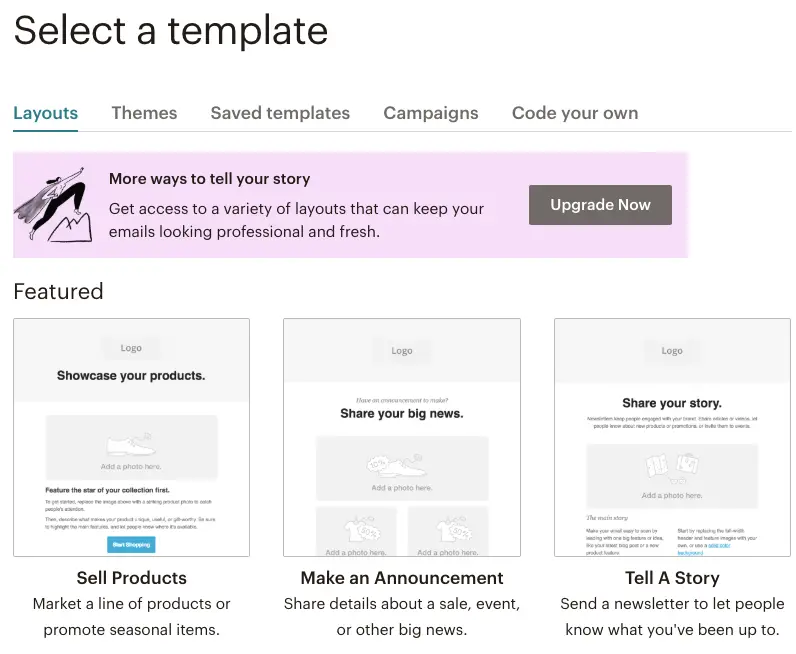
- Layouts - these are selection of different email templates that you can use to get started on writing your email campaign. The templates you can use will depend on your plan. In general, if you're on the Free plan you'll have access to two of the Featured templates, but will upgrade to access the rest, e.g:
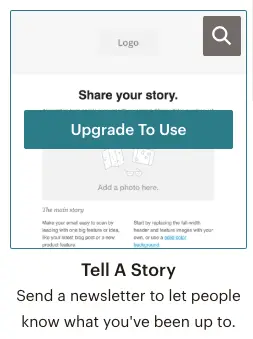
- Themes - these are pre-built templates for specific objectives that include images and text. These require less customization than Layouts before they can be used, e.g.
- Saved Templates. When you customize Mailchimp's templates you can save them as your own templates to re-use them later - this is where they will appear).
- Campaigns - this allows you to re-use the template from an earlier email campaign you created. The main difference between this and Saved Templates is that you don't have to remember to save a template to re-use it - you can simply choose a previous campaign to re-use that campaign as a template.
- Code Your Own - you can create your own templates from scratch, or purchase pre-built custom templates from third part market places. You will need to upgrade to either the Standard or Premium paid plan to be able to use this.
Since we're starting off simple in this lesson, we'll choose the Basic 1 Column template. You may prefer to select a different template at this point. Click the template you want to use and you will be taken to the next step - Design,
Design your email and write the content
The Design step of creating your email campaign is where you will add the words, images and links to your email.
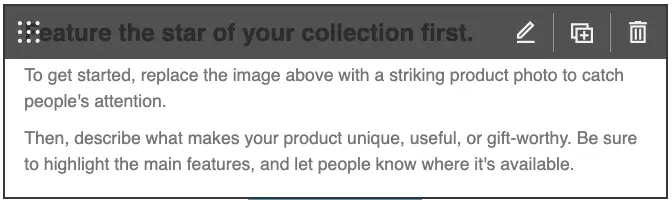
Whichever template you selected in the Template section, you will see some placeholder text in each of the elements in the template. It is important that you update all of the placeholder text with your own. If you leave any placeholder text unchanged, Mailchimp won't let you send the email campaign.
For the purposes of this lesson, I am going to make the following changes to the template that I have selected:
- Change the logo
- Edit the text block (both the heading and the content.
- Add a button that will take the reader to my website.
- Update the social links with the correct links for my social profiles.
Changing the logo in your email
- Float your mouse over the Logo block, then click the pencil icon to edit this block.
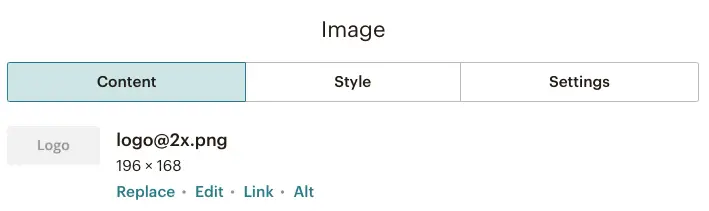
- In the right column you will see "Your Default Logo". Click the Replace link.
- You will be taken to Mailchimp's Content Studio. This is where all images and files you upload are stored.
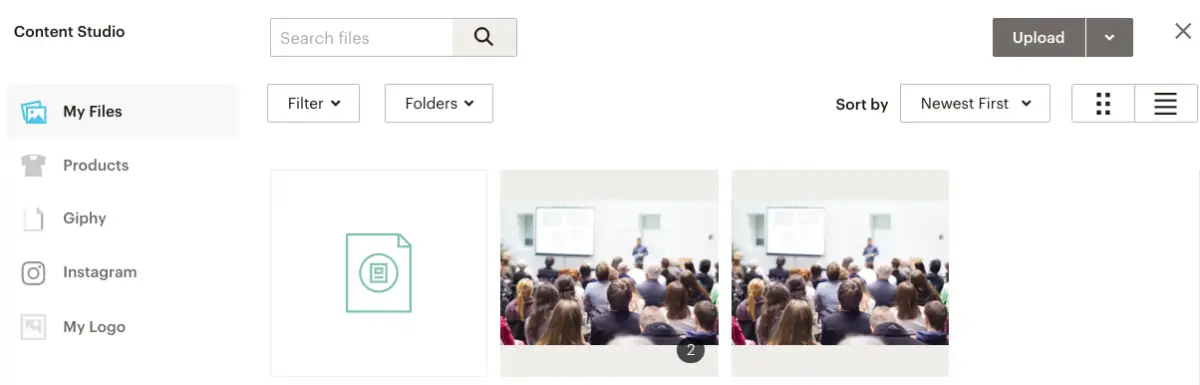
- In the top right corner of the screen, click Upload.
- The file browser for your computer will open. Find and select your logo.
- Your image will be uploaded and will appear in the Content Studio.
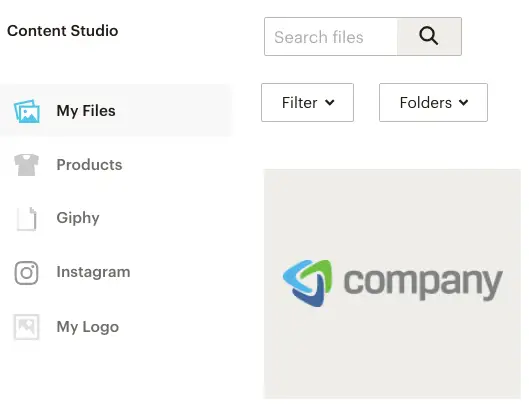
- Select the logo image.
- Finally, click Insert to insert the logo into your email. Your email design will update to reflect the new logo file you uploaded.
- Note that the border around the logo as shown below indicates that you are still editing the logo.
- Click Save and Close in the Campaign Editor to finish updating the logo in your email. The border will disappear.
Tip: You can make this logo the default for all new emails you create. Click Content Studio in the top menu, click your logo image, click the drop arrow on the View Details button, then choose Set My Logo. Your logo will then be added to the Your Logo section of Content Studio. To undo this, click My logo, select the logo image and click Delete. This will stop the image being used as your logo but will not delete the image from Content Studio.
Editing the text block in your email
- Float your mouse over the Text block, then click the pencil icon to edit this block
- In the right column, you will see the text from the block inside a rich text editor. Rich text means that you can format it, and it also means that you will see a toolbar with formatting buttons.
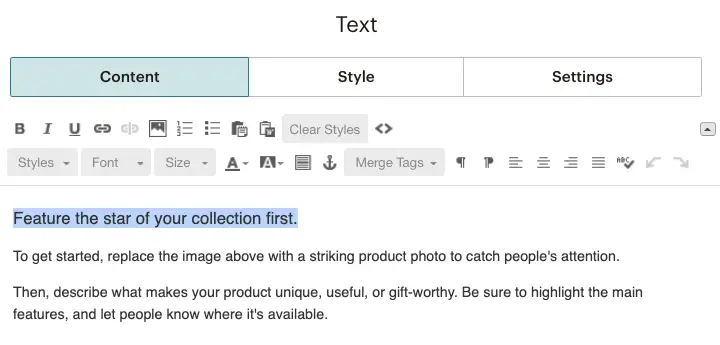
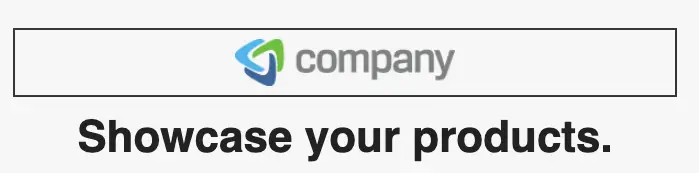
- Change the heading text by replacing it with your own text. The example above shows the title ready to be deleted and replaced with a new heading.
- Then, repeat the same with the rest of the text.
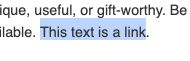
- To add a link to your text, select the text that should be linked and click the Link button in the toolbar. This is the fourth button in the first toolbar row.
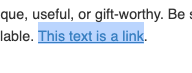
The text to be linked:
The link button on the toolbar is the fourth button shown below: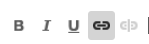
The link configuration box with my link entered into the Web Address field.:
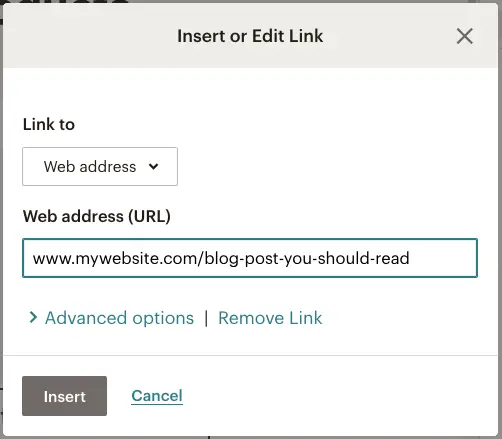
The text after it has been linked:
- Finally, click Save and Close to save the changes to your text block.
Note that all changes are automatically saved every 20 seconds. There is no option to "Exit without saving". You can use the Undo button (the second-to-last button in the first toolbar row) when editing to undo changes or mistakes before you click Save and Close.
Adding a button with a link to your website
- In the right column, you will see some block templates that you can add to your email. You do this by dragging a block into the email.
- Click and drag the Button block into your email. Don't drop it just yet.
- Move the button into your email where you want it to be, but wait until you see the message Drop Block Here.
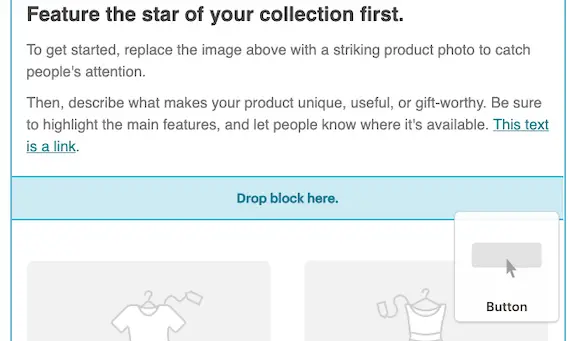
- If this is the correct position for the button, you can drop it now. Otherwise, drag it to the correct position before dropping it.
- In the right column, you can edit the content of your button.
- Change the default text from Buy Now to Visit My Website (or something else if you prefer).
- Leave the Link To option set to Web Address.
- Enter the URL for your website. Ideally, this link should point to a specific link within your website that is relevant to the content of your email campaign.
- Finally, click Save and Close to save the changes to your button.
It is important to include links in your emails. Mailchimp tracks link clicks and uses these to provide metrics to help you measure engagement with your email campaigns. Link clicks also help improve the Open rate of your emails.
Each click on each link for each subscriber will be tracked individually. Later, this will allow you to target future email campaigns at people who have a clicked specific link in a specific campaign.
Update the Social Links in your Campaign
- Hover your mouse over the Social Follow block in the footer of your email.

- In the right column, you will see each of the icons from the block listed.
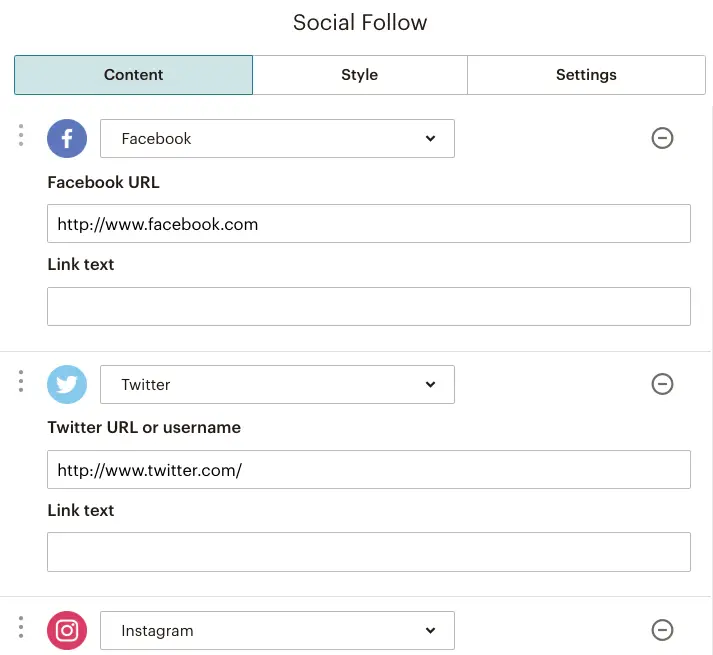
- Fore each social network, enter the URl to your profile page for that network.
- You can leave the Link Text field empty for now.
- If you want to change how the icons are presented, click Settings and choose the layout and presentation that you want. Some of these options will require that you complete the Link Text field.
- You can drag and drop these icons into a different sequence. Click the button with three dots to the left of the icon you want to move, and drag it up or down to the position you want.
- You can remove an icon by clicking the Remove button (
 ) on the right of the icon you want to remove. This will remove it instantly, and any changes you had made will be lost.
 - Click Add Another Service to add more icons, up to a limit of 10. If you need more than 10 you can add another Social Follow block beneath the existing block.
Important: A common mistake people make is to leave these icons unchanged. Since they are part of the standard footer in a Mailchimp email, it is easy to overlook them and forget to add your social profile links.
Check if your email is ready to send
Once you have finished writing your email content, you should check whether it is ready to send. To do this, click Save & Close at the bottom right of your screen. You will be taken to the edit screen for your campaign.
Normally, you should see the Design button, which we clicked earlier to start designing our email campaign. However, if there are any problems with your email, the Design button will have changed to a Resolve button. This indicates that there are problems with the email that you must fix before Mailchimp will allow you to send the email. The issues section will look like this in the main campaign editing screen:
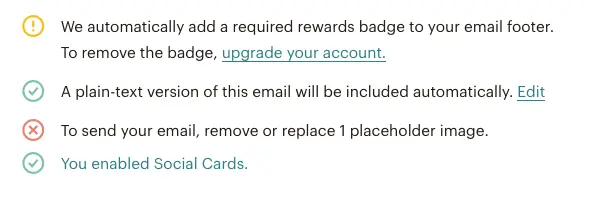
The most common issue people encounter when they first start using Mailchimp is the default content alert, To send your email, remove or replace the placeholder text, followed by a list of the places where default content from your chosen template is still being used. In this case, you simply need to click Resolve and update the default content that Mailchimp has identified.
Other alerts you may see include:
- We automatically add a required rewards badge to your email footer. To remove the badge, upgrade your account.
- This is for information only. The rewards badge is a Mailchimp logo in the footer of your email. You can remove this on a paid plan. You will only see the message about removing the badge if you are on the free plan.
- We recommend setting a default logo to make sure all your emails are branded.
- This is also for information only - you can send your campaign without setting a default logo. We covered how to do this in the previous section, Changing the Logo In your Email.
- We detect a broken conditional block in your email.
- You must fix this before you can send your email. Conditional blocks are an advanced subject in Mailchimp, and are used to control the inclusion of different content based on merge tags. Nothing we have done in this lesson will trigger this alert.
Once you have resolved the "must fix" alerts in your email, you will now be able to send your email - although we still have some more work to do before we can click Send.
Sharing your campaign with a Campaign Link
Although this lesson is about creating an email campaign, it is common practice to promote your campaign via other methods.
Mailchimp allows you to do this by providing a Campaign Link for each campaign you create. The Campaign Link takes you to a page containing the content of your email. This page is hosted by Mailchimp on your behalf.
To view the Campaign Link for the campaign you are creating
- Make sure you are on the edit screen for your campaign.
- Scroll past the the Content section of your email to the section titled Share Your Campaign.
Once there, you will see your campaign link, which looks like this:
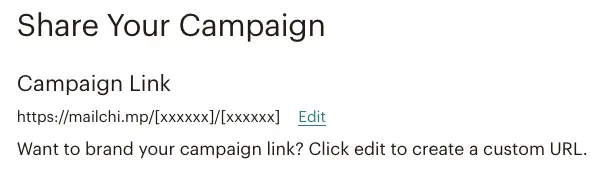
https://mailchi.mp/[xxxxxx]/ followed by the subject of your email.
At this point, the campaign link does not work because we have not yet sent our campaign. Once you send the campaign the section [xxxxxx] will be replaced with a number that is unique to your campaign.
Note that you can edit the URL at this point. This will allow you to edit the part of the URL that defaults to the title of your email. You may prefer to use a different title to the one proposed by Mailchimp.
In addition, you can also replace the unique identifier with your own domain. This requires that you set up the Custom Domain feature in Mailchimp. This is available on all Mailchimp plans for US$99 per year. In this case, your Campaign Link might look like this:
https://mailchi.mp/your-chosen-url/ followed by the subject of your email.
Adding a Social Post to your Campaign
Another way to promote your campaign is to post it to your social media profiles.
- Mailchimp provides Auto Post, which will automatically post your new campaign to your connected social networks when the email campaign is sent. Support for Facebook, Instagram and Twitter is provided.
- Another option is to use Social Cards, which allow you to control how the social post will appear, since they are displayed any time your campaign URL is shared by someone. Social Cards support Facebook, Twitter and Pinterest but not Twitter.
Note that you will need to integrate your social accounts with Mailchimp in order to use Auto Post. This is not required for Social Cards, which simply provide a formatted post of your campaign that will be used when your campaign is shared by someone.
- Facebook integration: https://mailchimp.com/help/connect-or-disconnect-the-facebook-integration/ (note that you can only post to a Facebook Page you control, and not to a personal profile)
- Instagram integration: https://mailchimp.com/help/add-instagram-facebook-page/
- Twitter integration: https://mailchimp.com/help/integrate-twitter-with-mailchimp/
Auto post when your campaign is sent
These steps cover how to auto post your campaign to Facebook, and assume that you have already connected Facebook to your Mailchimp account.
- In the Edit screen of your campaign, scroll down to "Add A Social Post To Your Campaign"
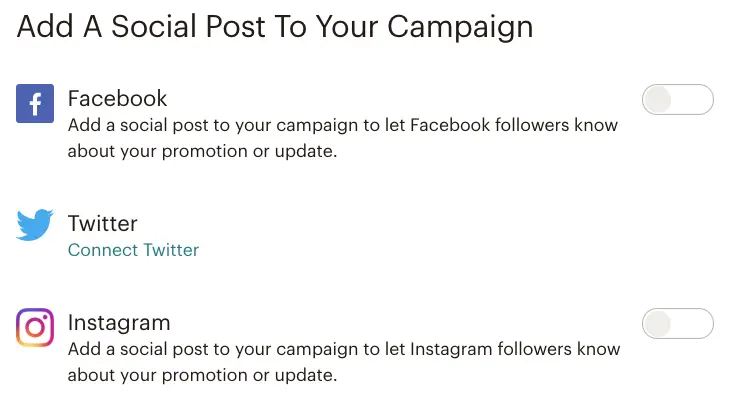
- Enable Facebook. This enables auto posting for just this campaign. The option to enable it will not appear if you haven't connected Facebook and Mailchimp.
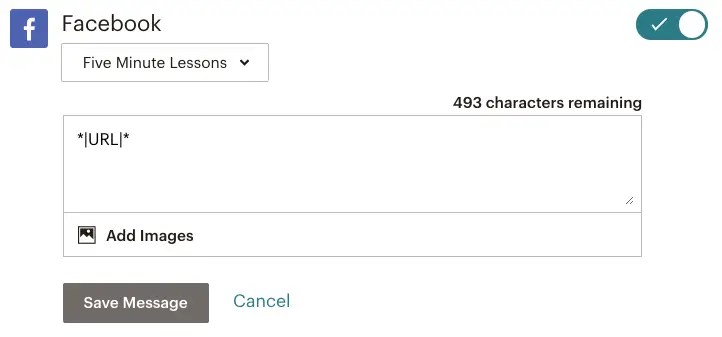
- Choose the Facebook page you want to post to (if you have access to multiple Facebook Pages, you will see those pages listed in this dropdown).
- A default message will have been created already using the subject line and URL from this campaign (the example above shows only the URL merge gat. You can keep this message or change it to something else. Remember that this is what people will see on Facebook, so make it memorable!
- Make sure to keep the *|URL|* merge tag in the message - this will be converted to your Campaign Link when the message is posted to Facebook. Without it, viewers of that post won't know where to find the campaign that your post is about.
- If you want to add one or more images, click Add Image and select one or more images from the Content Studio in your Mailchimp account. You can add multiple images at once or add each image one at a time. Note that Mailchimp recommends that your image is no larger than 4MB in size.
- Click Save Message.
Important: Don't use merge tags for individual contacts in this message. For example, if you included *|FNAME|* as part of your subject line, you should remove it. Mailchimp will not process these merge tags correctly. Using the *|URL|* marg tag is OK because it is campaign-specific rather than specific to individual contacts.
Create a Social Card for your campaign
Social Cards allow you to control how your campaign will appear on Facebook, Twitter or Pinterest (but not Instagram) when someone shares your campaign link to one of those networks. Enabling Social Cards does not result in your campaign being shared automatically to your social networks - that's the job of the Auto Post feature we discussed in the previous section. However, enabling Social Cards does affect how your Auto Post will appear.
Social Cards are campaign-specific, which means you need to enable and configure them for each campaign you create.
Follow these steps to configure a Social Card for your campaign.
- In the Edit screen of your campaign, scroll to the Content section and click Enable Social Cards.
- In the right column, click Enable Customized Social Cards and configure the settings.
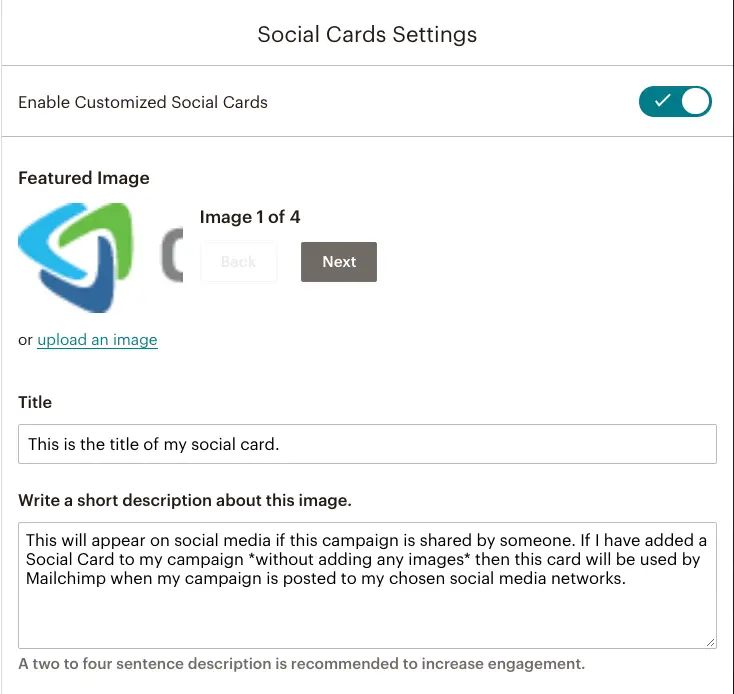
- On the right side, you will see a Featured Image section. If you have added one or more images to your campaign, Mailchimp will let you choose which of these images you want to use on your Social Card. Alternatively, you can upload a new image specifically for the social card in this campaign.
- You can then enter the Title and a Description of the image.
- I've used settings in my example below so you can see how it appears in the previews that follow.
- The three tabs on the left - Twitter, Facebook and Pinterest - will automatically show you a preview of the information you have added.
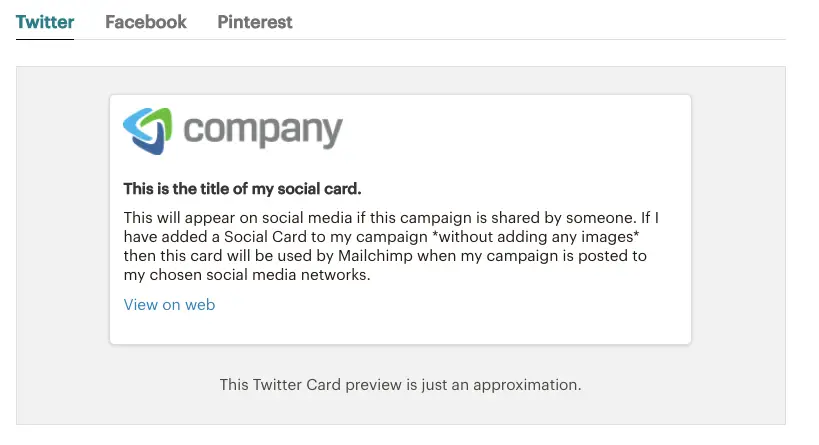
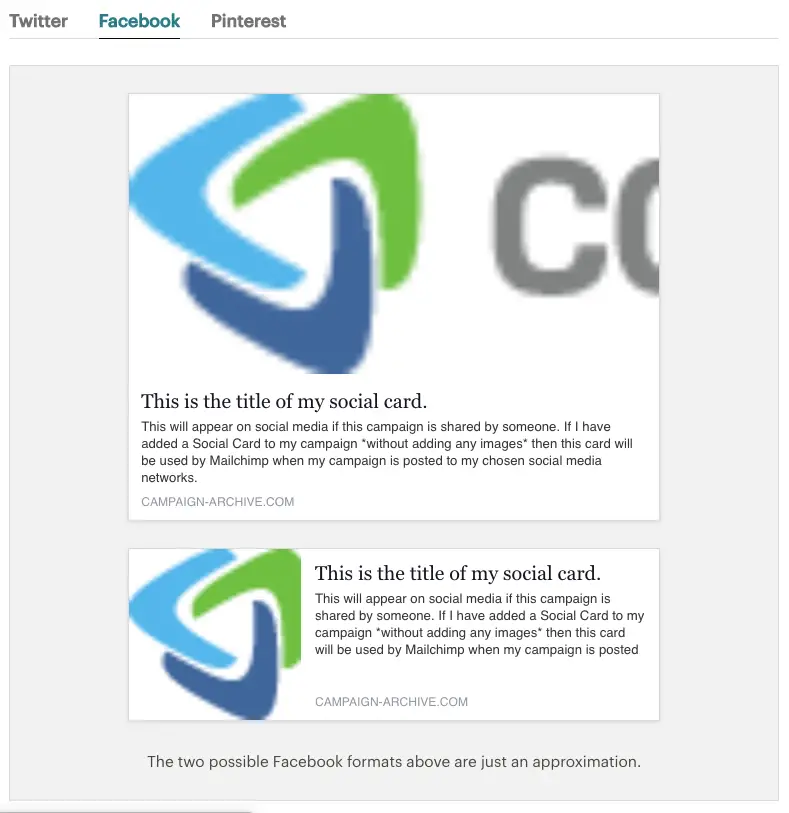
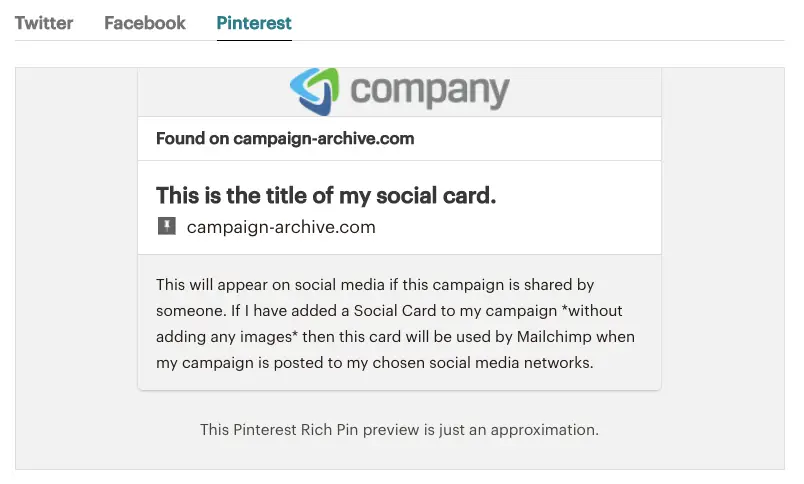
- Note that these previews are only an approximation - the actual format will be controlled by the individual social networks depending on their current posting rules.
- Click Save & Close once you have finished.
It will take some experimentation to decide on the best way to format your Auto Post and Social Card settings. Here are some key points to be aware of when you use Social Cards:
- If you plan to use Social Cards you should not add images to your Auto Post. If your Auto Post includes one or images, the image(s) in your Social Cards will be ignored and the Auto Post images will be used instead.
- If you send a test email before you have enabled Social Cards, you may find that the Social Card is ignored and content from your email is used instead. In this case, you will need to manually refresh the card in both Facebook and Twitter to show the correct information.
- If you replicate a campaign, you may find that the Social Card for the previous campaign is used. As mentioned in the previous point, you will need to manually refresh the cards using Facebook's and Twitter's tools for doing so.
- Once you send a campaign, you cannot edit the Social Card. Check your Social Cards carefully, and then check again. Unlike the two previous points where old data is being used, there is no way to fix mistakes in a Social Card.
Set up tracking for your email campaign
Mailchimp provides various ways to track your campaigns once they have been sent. However, many users are not aware of these options, and how they can be useful in learning what their subscribers liked - or didn't like - about their campaigns. As a result, they miss opportunities to learn and improve their campaigns over time.
In this section, we'll look at the main tracking options that everyone should consider enabling. These settings must be configured fo every campaign you create - there is no way to set them at the Audience or Campaign level, unfortunately. It is easy to forget these options - and once a campaign has been sent, there is nothing you can do to change them.
To see the different tracking options for your email campaign:
- Go to the Edit page for your campaign.
- Scroll to the end of the page (past the section on Social Posts)
- You will see a section called Settings and Tracking.
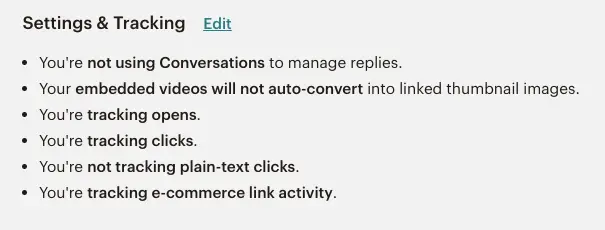
- Click Edit in this section.
A number of options will be displayed - some of which are enabled, and some not.
The following settings will be enabled by default:
Use Conversations to manage replies (on by default)
![]()
Some of your subscribers will reply to your email campaigns, even if you have used a no-reply address in the From settings of your campaign. With this option enabled, Mailchimp will configure the email it sends so that emails will go to a different email address - one that is unique to your campaign. Rather than being lost or ignored, those replies will then be displayed in the report for your campaign - and each email will also be visible in the contact profile for the person who sent that campaign.
Recommendation: Leave this option turned on unless you find that the replies are spam or unhelpful.
Track Opens (on by default)
![]()
The Open Rate of a campaign is one of the most important metrics for the success of a campaign. Mailchimp will track each time your email is opened using what it calls an "invisible beacon" in your email campaign. This "beacon" is unique to each user that is send your campaign. In other words, Mailchimp can tell which users opened your email campaign, and how many times they opened it.
This metric is imperfect because some email software will not download the "invisible beacon". Outlook is a good example - when you open an email it may ask if you want to download the images embedded in the email. If your reader chooses not to allow this, the invisible beacon will not be downloaded, and Mailchimp will not be aware that the reader opened the email. This is not a reason to disable this setting, but it is something to be aware of when interpreting your results.
Recommendation: Leave this option enabled unless you really don't want to collect this data. Turning this option off removes the ability to see which people opened your email.
Track Clicks (on by default)
![]()
Another important metric in Mailchimp is the number of people who clicked a link inside your email campaign - and which links they clicked. Mailchimp does this by converting every single link in your email to a unique tracking link that allows them to identify the campaign and the individual link that was clicked. If you included the same link multiple times in your email campaign, Mailchimp will track each instance of that link separately.
This tracking allows you to work out which links were most popular and, therefore, which subjects in your email campaign were most interesting to your readers. It also provides another way for Mailchimp to identify when an email has been opened.
Recommendation: Leave this option turned on unless privacy rules or concerns require that you disable it. A related recommendation, already discussed earlier in this lesson, is to make sure that you use lots of links in your email campaigns so you can get a better idea of how engaged your readers are by your email campaigns.
E-commerce Link Tracking (off by default)
![]()
This option is only relevant if you have integrated Mailchimp with an ecommerce store using Mailchimp's Connected Sites feature. If you have done this, then you should definitely enable this option for every campaign you send. By doing so, you will capture data about how many website visits and sales each campaign generates, and which products were purchased as a result. This makes it easy to calculate the return on investment from each email you send. You will also be able to create segments based on the purchase history of your subscribers, which makes it easier to send targeted emails to your subscribers in the future.
Recommendation: Enable this option if you have connected Mailchimp to an ecommerce store.
Google Analytics Link Tracking (on by default)
![]()
Google Analytics Link Tracking is off by default, and you must integrate Mailchimp with Google Analytics before you can enable it. This is done at the Account level within Mailchimp and requires that you are an Admin in Mailchimp.
Once it is enabled, you will be able to track visits to your website for each individual campaigns you send (this is assuming, of course, that you have included links to your website in your campaigns - which we strongly recommend that you do with every campaign you create.
In addition, if you have enabled eCommerce tracking in Google Analytics, you will be able to analyze your sales data in Google Analytics and measure how successful your email campaigns are at generating sales compared to other sources of traffic.
Recommendation: Enable the Google Analytics integration with your Mailchimp account and enable this option for every campaign.
There are a number of other settings that we have not covered here. If any of them are particularly relevant to you, Mailchimp provides some additional information on what each option does. In some cases, such as the Salesforce, Capsule and Clicktale integrations, you will need an account with the related service in order to enable the integration options in individual campaigns
Testing your email campaign before sending to your audience
We are almost ready to send our new campaign, but there is one more thing that we need to do before we can send it - testing.
Testing is an essential part of creating and sending an email campaign. There is nothing worse with sending out an email with a mistake in it and having to send a follow-up with a correction immediately afterwards.
If you've spent a lot of time planning and creating your campaign, it is easy to overlook small details along the way that should be fixed before you press Send. Fortunately, Mailchimp provides a set of tools to help you test and check your emails before sending them.
- Preview mode
- Send a test ermail
- Push to mobile
- Link Checker
- Social Cards
You can find these options buy clicking Edit Design in the Edit page of your campaign. When you do this, you'll see a menu option in the top right corner of the page called Preview and Test. Each option we are looking at can be found in this menu. In this section we'll look at each of these testing options (apart from Social Cards, which we covered earlier) and discuss how to use them so you will reduce or remove the chance that your email will go out without any typos or broken links.
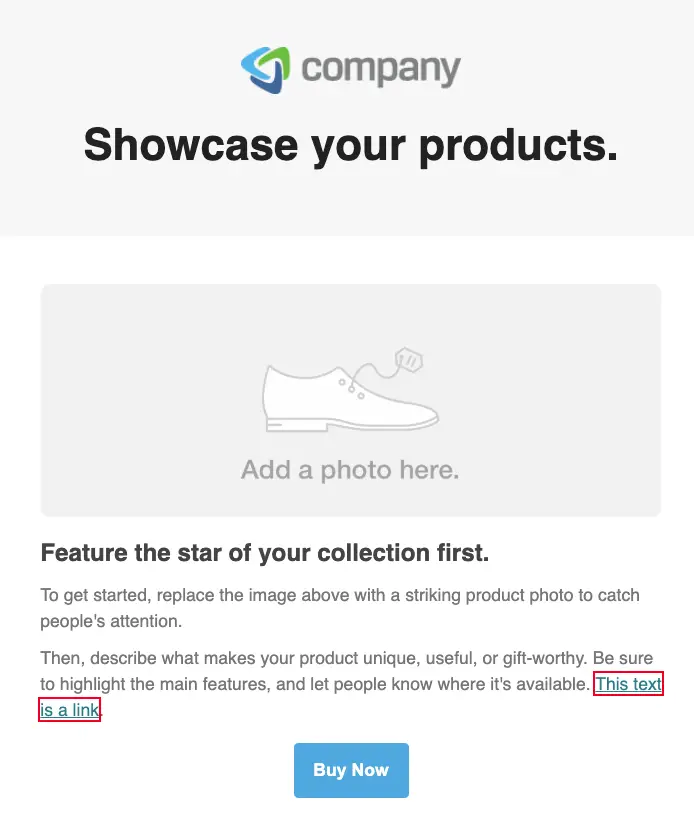
Preview mode
Preview Mode provides two important testing features:
- A preview of how your email will appear on Desktop and Mobile devices.
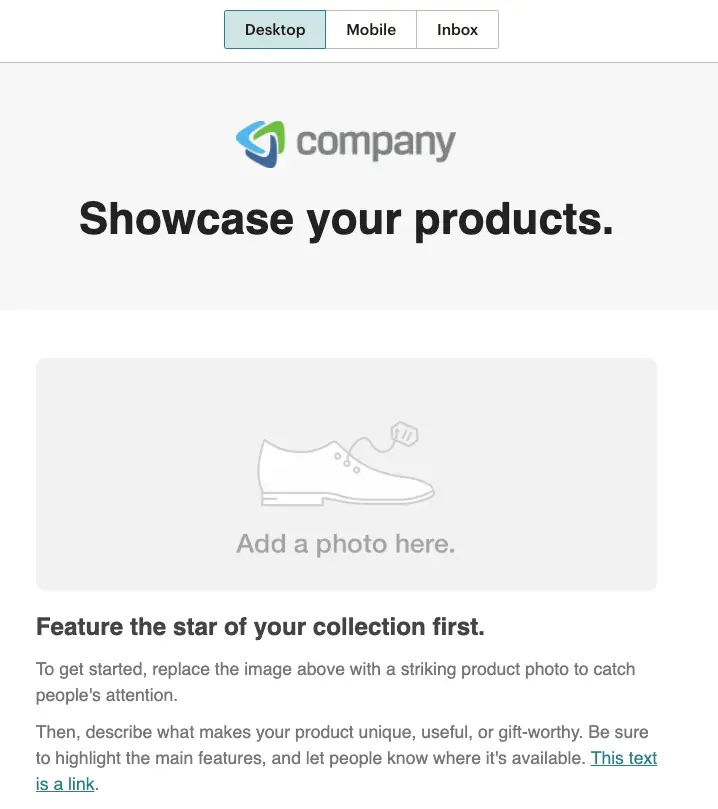
- A preview of your emails where the merge tags are replaced with actual data from your subscribers.
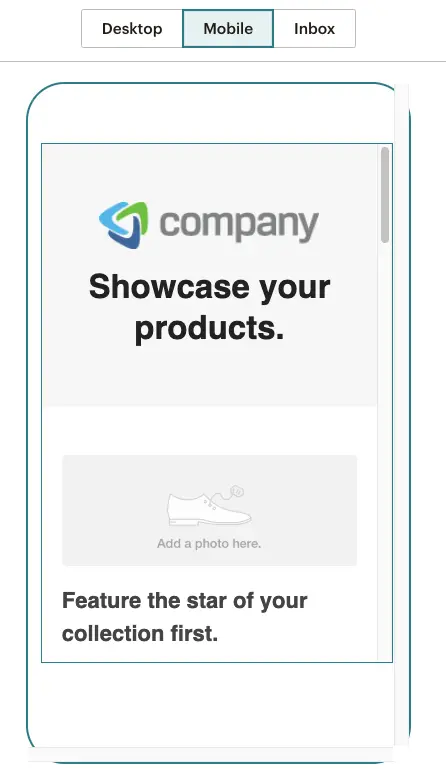
The device previews allow you to spot any problems with how your email will appear on generic Desktop and Mobile devices. These are only approximations and are not a guarantee of how your email will look in all email clients.
Email software is notoriously bad at rendering HTML emails (HTML allows us to create formatted emails with embedded images and buttons). Iit is difficult to predict how your email may actually look on, say, a laptop computer running Outlook 2010. Mailchimp's templates include special configurations that help ensure that your emails will look good in most email software - but nothing is certain until the email lands in someone's inbox. However, all that said, our experience is that emails created with Mailchimp's templates generally look OK in most devices and screen sizes.
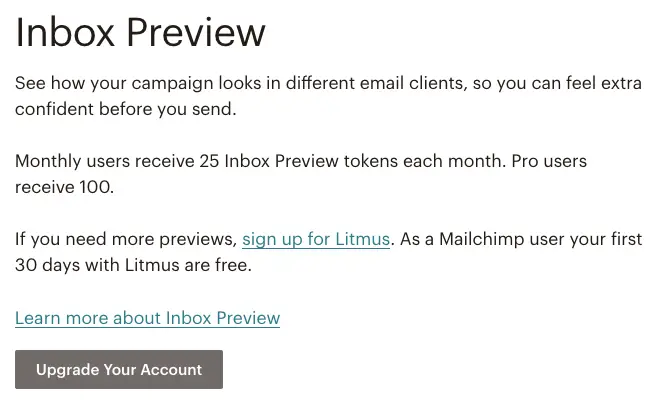
If you need better and more reliable device previews, Mailchimp also offers a feature called Inbox Preview.
This uses sophisticated emulation software to preview your email as it would appear in different email software and on different devices. Inbox Preview is only available on Mailchimp's paid plans. You get 25 credits per month (100 on Mailchimp's Premium plan) which allows you to test your emails on a range of different devices. There are two downsides to this.
- First, each device you test your campaign on costs one credit - so 25 credits won't last long.
- Second, you can't buy extra credits. Instead, Mailchimp recommends that you switch to Litmus, the software that powers Mailchimp's Inbox Preview tool.
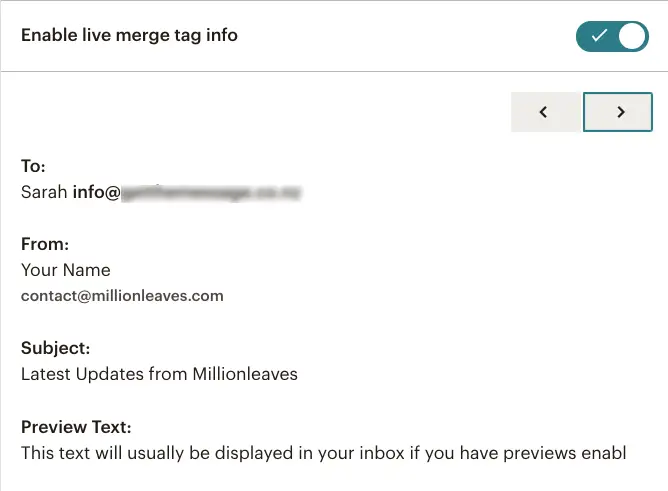
The live preview of merge tag data is almost as important as the device preview feature.
- It allows you check that the merge tags have all been entered correctly.
- It allows you to see what your email looks like for subscribers that don't have data stored for the merge tags you have used. For example, what happens if you've started your email with Dear *|FNAME|* but you don't have a first name entered for all of the recipients of this campaign? This can cause you to rethink how you've used your merge tags, and come up with ways where this situation would not be a problem.
- In some cases you may also spot merge tags with "junk" data, such as "Mrs" in the First Name field.
You can enable this option by turning on Enable live merge tag info. Once you've done this, you can click through each subscriber in your list and check how their merge tags look in your email campaign. You can then decide whether to change your campaign, fix the merge tags, or redefine the recipients for your email campaign. An example of the last option would be to define a segment that excludes people with no value in the First Name field.
Send a Test Email
You should always send at least one test email for each campaign you create.
To send a test email, click Edit Design for your campaign, then choose Send a test email from the Preview and Test menu. The options you have when sending a test email include:
- Who should receive the test. You can supply one or more email addresses here, with email addresses separated by commas. The email addresses you supply here do not have to belong to members of your audience. If you only want to send a test to yourself, use the next option instead.
- Send the test to One or more account users, i.e. people who have a login for your Mailchimp account. If you are on the Free plan, you will only have one account user unless you had created additional users prior to May 2019. If you are only sending tests to your self and/or your team, this is the best option to use.
- Include instructions and a personal message. This is optional, and allows you to explain the purpose of the test to your testers, e.g. "First draft of our latest email campaign".
- Who should be notified by email about new comments. The test email will include an introduction that advises recipients that they can reply to the test email with their comments. This option allows you to choose one or more account users who should receive a copy of those comments by email.
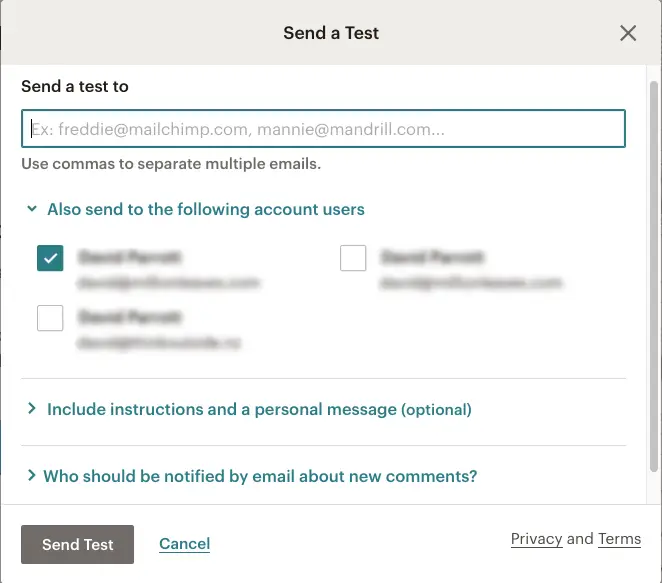
Once you have chosen these options you can click Send Test.
After you have received a copy of the test, you can review the email to ensure that everything is correct and looks the way you intended. If not, you can update the email and send another test.
Important: Sending additional tests after each change you make is highly recommended, rather than assuming that any fixes you just made have worked the way you intended. Also, it is not uncommon to notice additional issues with each test. Better to test repeatedly and be sure that your email is ready than to assume that it is ready after just one round of testing.
Push to Mobile
If you have installed Mailchimp's app and connected it to your account (highly recommended) then you can send a preview of the email to the Mailchimp app. This will show you a simulation of how the email will look, and is highly recommended for each email campaign you send.
To preview your email on the Mailchimp module app, click Edit Design for your campaign, then choose Push to Mobile from the Preview and Test menu. One of two things should happen:
- You will be prompted to install the app. If you have already done so, check you have logged into your account via the app. If this message continues to appear, exit the campaign design screen, then re-open it and try again.
- You will see a dialog box with a Push to Mobile button. It also explains that Push Notifications must be enabled for this to work. You should do this before clicking Push to Mobile.
Once you click Push to Mobile, a notification from Mailchimp will appear on your mobile screen.
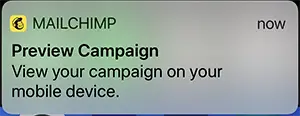
Tap the notification to see the preview on your mobile screen.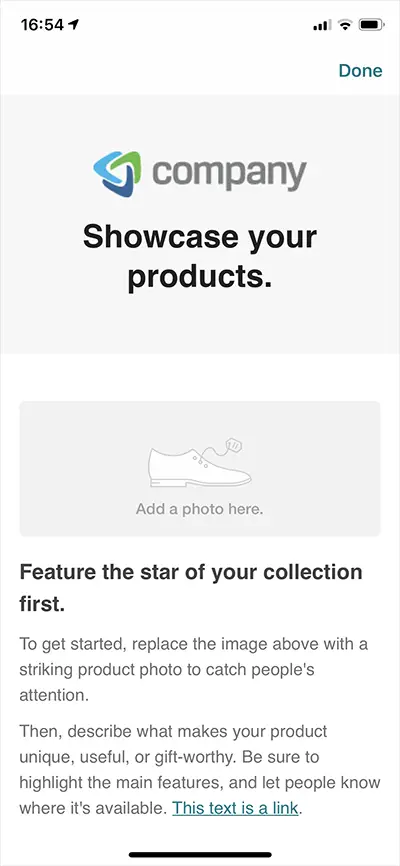
Note - as with Preview Mode (covered earlier in this lesson), this is a simulation of how the email will look. It is likely to look more accurate on a mobile device than the mobile version of Preview Mode but is still not the same as viewing a test email in your mobile email client.
Open Link Checker
This feature allows you to check that all links included in your campaign are valid (i.e they work) and correct (i.e. they point to the correct place).
It is highly recommended that you do this for all links in your campaign before sending it. This is preferable to sending a followup email with a correction if it turns out that one or more links in your campaign were incorrect.
To send run the Link Checker, click Edit Design for your campaign, then choose Open Link Checker from the Preview and Test menu..
The Link checker will open in two panes.
- The left pane will show a preview of your email with links highlighted.
- The right pane will show a list of all the links in your email (including links in the footer, such as the automatic Update your preferences and Unsubscribe links.
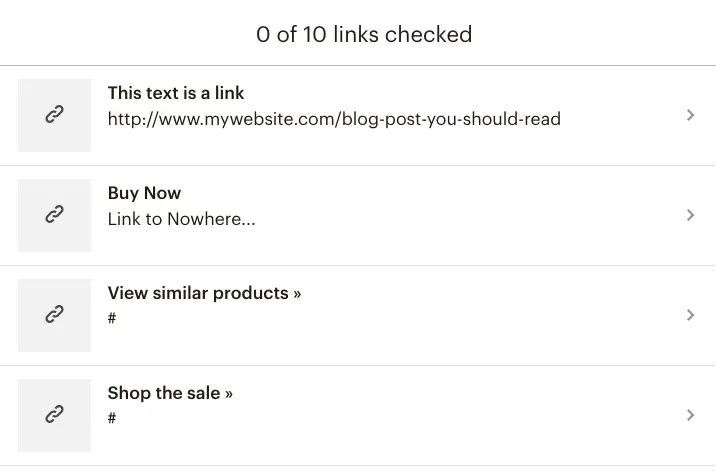
You can then float your mouse over each link in turn OR click the Next button in the bottom right corner of the screen. This will highlight each link in your email and identify if it is broken by highlighting it in red.
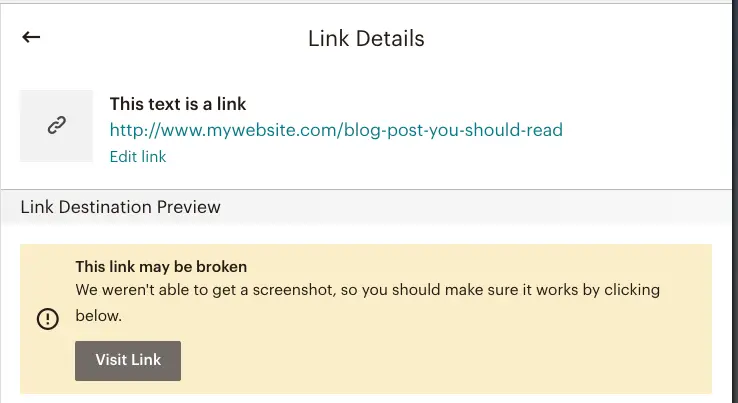
There are several points to note when doing this.
- You can also click each link in the right pane to see more information. You can then edit each link if required, e.g. if the link is broken or incorrect.
- You can also visit the link from here. This will attempt to open the link in a new browser tab or window.
- The Archive link (the optional View this email in your browser link that is included in Mailchimp's standard templates) will show as broken. You should ignore this - the Archive link is not generated until you send the email.
- Similarly, there are various "system" links generated using standard Mailchimp merge tags. The Archive link is one, as is the Unsubscribe and Preferences links. Mailchimp will advise that "This link contains a mergetag, anchor, mailto or some other destination that our website photographer refuses to visit". You can safely ignore each of these.
Once you have finished the Link Checker you can close it by clicking the X in the top right corner of the screen.
Send your email campaign
Once you have completed all of your tests, and incorporated all feedback from your test recipients, you should now be ready to send your email.
You have two options at this point:
- Schedule the campaign to be sent at a particular time on a specified date. This option requires at least the Essentials paid plan. Your Free plan may also have this option if you had used it before May 2019.

- Send the campaign now.
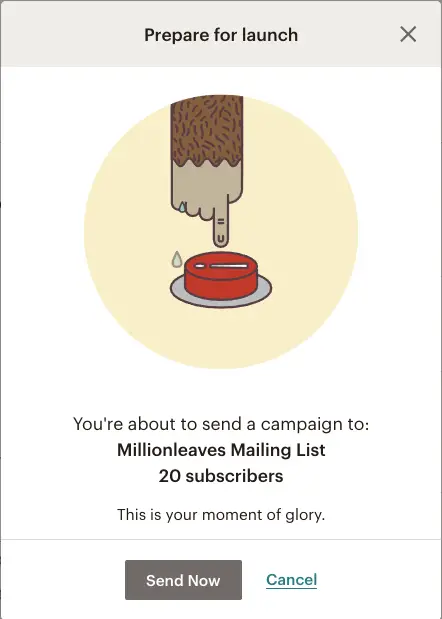
When you click Send Now, you will see a final notice from Mailchimp confirming that it is about to send your campaign, and the number of subscribers it will be sent to. Check this carefully to make sure this matches your expectations. If not, exit and review the recipients for your campaign.
If you are on a Standard plan (as of May 2019) or a paid plan that predates May 2019, the Schedule option will include additional features you can use when scheduling your campaign.
- Delivery by time zone. If you specify a delivery time, this option allows you to deliver your campaign at that time for each recipient according to their time zone, e.g. 10am in New York and 10am in London rather than 10am in New York and 3pm in London.
- Batch delivery. This option will split the list of recipients into batches which will be delivered one after the other. This can help avoid a "click flood" where a large number of clicks to your website could cause it to slow down or crash. You can define the number of batches and how far apart they should be sent.
- Sent time optimization. Mailchimp will send your emails at what it believes to be the best time for each subscriber. This is based when your subscribers are most likely to engage, using data from across all Mailchimp accounts they have subscribed to.
Summary
This tutorial covered the process of creating an email campaign in Mailchimp from start to finish. Hopefully this has provided you with the information and best practice advice for creating and sending successful email campaigns.
Join our mailing list
Our Comment Policy.
We welcome your comments and questions about this lesson. We don't welcome spam. Our readers get a lot of value out of the comments and answers on our lessons and spam hurts that experience. Our spam filter is pretty good at stopping bots from posting spam, and our admins are quick to delete spam that does get through. We know that bots don't read messages like this, but there are people out there who manually post spam. I repeat - we delete all spam, and if we see repeated posts from a given IP address, we'll block the IP address. So don't waste your time, or ours. One other point to note - if you post a link in your comment, it will automatically be deleted.
I became the admin of an existing Mailchimp account for a non-profit and have been learning on the fly -- primarily sending newsletters and event announcements. This is a really great overview of the process that both reinforced that I was doing at least a few things right and introduced me to some concepts and features that I may be able to employ in the future (especially segments and groups). So I'm sure I'll refer to it time and time again. Thank you for putting it together!