Stop table rows in Microsoft Word from splitting across pages
Tables in Microsoft Word are great, but the default settings for tables are sometimes not what you want. In particular, Word will split individual rows across two pages if it needs to. If you'd rather have Word break tables up between pages so that each row is kept intact and not split across two pages (i.e. force Word to insert a page break before the row rather than in the middle of the row), this lesson will show you how to do it.
Note that this lesson covers Microsoft Word 2007, 2010 and 2013 for Windows, and Microsoft Word 2011 for Mac.
Tell Microsoft Word not to split table rows across pages
This lesson assumes you have already created a table that spans two or more pages (or will do by the time you've finished creating it). Once you've done this, follow these steps:
- Select the whole table you are working on. By doing this, Word will apply the setting to all rows in the table, including rows you add later.
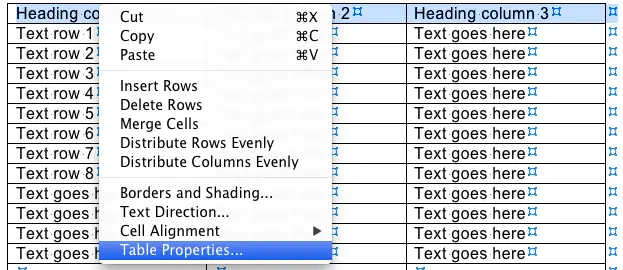
- Click the icon with four arrows to the top left of the table as shown below. This will select the whole table. It can be a little tricky to get it first time, but persevere!

- Once you've selected the whole table, right-click anywhere inside the table and choose Table Properties:
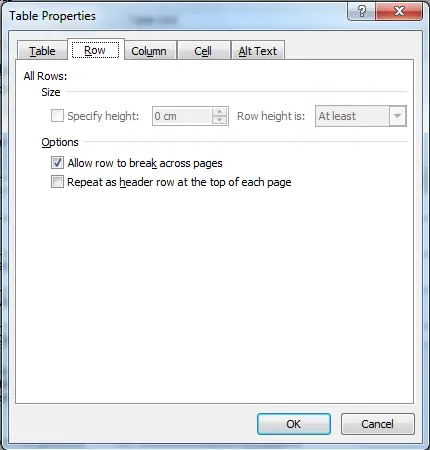
- In the Table Properties dialog, choose the Row tab. Check that the dialog says Rows 1-x (where x is the number of rows in your table). In the example below the table being edited has 44 rows.
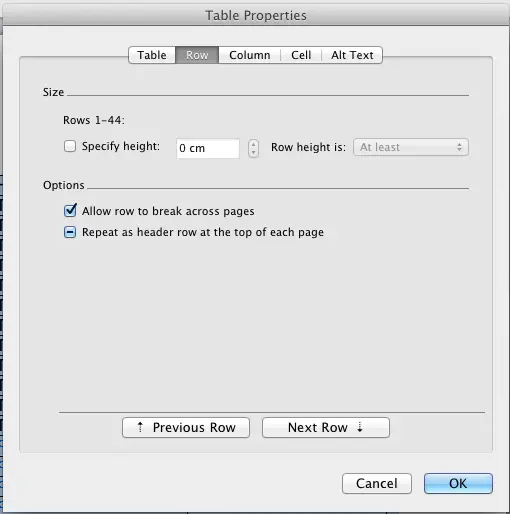
- Deselect the option to Allow rows to break across pages. This will apply to all 44 rows in my example table.
- Click OK.
Word will automatically repaginate the document to split the table so that each row is kept intact.
- This means that a row which was previously split between two pages will move onto the following page.
- Note that you can also use this technique to format just one row in your table. Simply right-click in the row inside the table that you want to stop from splitting across pages and follow the steps above.
Make your row settings the default for all future tables (the quick way)
Whilst the techniques described are useful, it's a nuisance to have to set these options every time you create a new table in a document. In this section, we'll look at how to make these settings the defaults.
- First, click somewhere in one of your tables. The ribbon toolbar should change to look like the following:

- Notice that there are a number of different table styles available to you. We are going to focus on the defaults for the first style shown.
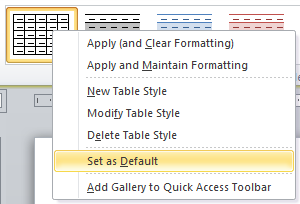
- Next, right-click on the first button on the toolbar and choose Set as Default:
- You will then see the following dialog box:
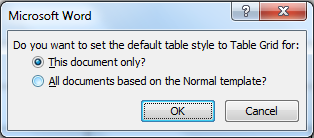
- Change the option to All documents based on the Normal template, and then click OK>
At this point, you have now changed the table settings to match the settings of the current table; you should test it with a new document to ensure that the settings have indeed been set as the default.
Make your row settings the default for all future tables (more options)
It may be that you want more control over how the defaults are set for your tables. The following steps allow you control everything about your default table settings.
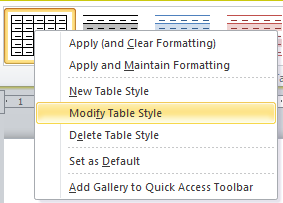
- Instead of choosing the Set as Default option as shown above, right-click on the first button on the toolbar and choose Modify Table Style instead:
- This will display the following dialog box:
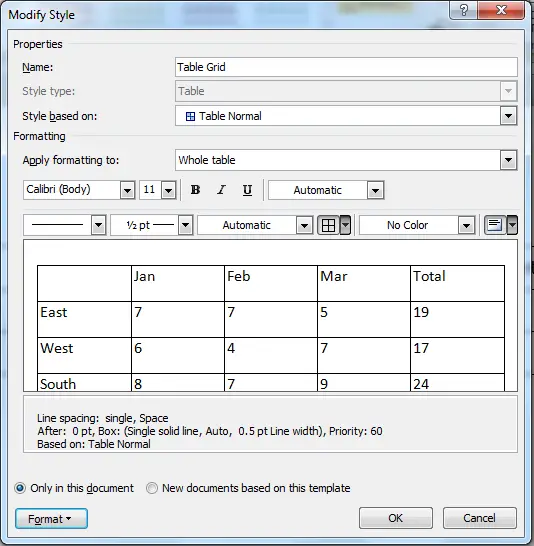
- A couple of things to note in the picture above:
- The option to Apply formatting to is set to Whole Table. This is what we want for this example, but you can experiment with the options here to format different parts of the table in different ways.
- The option "Only this document" is selected. Change this to "New documents based on this template". This will ensure that any changes we make here will be applied to all tables from now on.
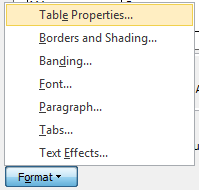
- Next, click the Format button and choose Table Properties as shown here. Note the other options you can set for your table, e.g. banding - this is covered in our lesson Set banding colors in Word 2010 table styles:
- The Table Properties dialog will be displayed. It will be familiar to you since it's the same dialog that we used earlier in the lesson to stop rows breaking across pages, and to set the first row to repeat at the top of each page in the table:
- You can now set the two options to what you want and then click OK. This will return you to the Modify Styles dialog. Click OK again to return to your document.
- Check that your table defaults have been set. Make sure you test by creating a new table in the current document AND a new table in a new document.
If you have any feedback on this lesson on stopping rows from breaking across pages, or you have a question about what was covered in this lesson, please leave us a comment below.
Join our mailing list
Our Comment Policy.
We welcome your comments and questions about this lesson. We don't welcome spam. Our readers get a lot of value out of the comments and answers on our lessons and spam hurts that experience. Our spam filter is pretty good at stopping bots from posting spam, and our admins are quick to delete spam that does get through. We know that bots don't read messages like this, but there are people out there who manually post spam. I repeat - we delete all spam, and if we see repeated posts from a given IP address, we'll block the IP address. So don't waste your time, or ours. One other point to note - if you post a link in your comment, it will automatically be deleted.
Comments on this lesson
Thanks for the tip
Hi Nick
Great tip - thanks. I've not tried that before, but it came in handy this week on a document I was creating.
Regards
David
That's what I'm talking about
That was exactly what I needed. Thanks!
Exactly what I needed!
That was exactly what I needed. Thanks!
keeping rows from being split in Word tables
Even this method didn't work for me. It didn't have any effect. When trying to do this through Table Properties, I couldn't even click on the box to disallow row splits (it was "grayed out"). I suspect this is tied to the fact that I've merged some cells in some columns of the table, because I haven't encountered this problem before. I'm working on a MacBook Air, Word 2011. Thanks,
John S.
Hi John
Hi John
Yes - the moment you merge cells from two or more rows into one, you lose the ability to stop that merged row from splitting across pages. However, it works OK if you've merged cells within the same row.
Regards
David
word 2011 for mac - splitting merged rows
I couldn't stop the merged rows from splitting, so I inserted a blank row where I wanted the table to split, removed all the borders so it was "invisible", then adjusted its height until it pushed the following row down onto the next page, where I wanted it. Seems to have worked...
Exactly what I needed. Thanks.
This solution for preventing merged row from splitting across pages worked great for me. Thank you!!!
Not allowing table to split across pages
Thank you for this tip - it worked - I have been battling this issue forever. I'd like to set it up as a default - do you know if I can do that?
thank you again
Debbie
Set table defaults
Hi Debbie
Yes - you can set this as the default. I've just updated the lesson to cover how to do this - let me know how you get on.
Regards
David
set MS table row defaults
Can I set table defaults in MS word such that any new table has
- head row repeatable when the table is plit
- non of the rows are split across pages
Thanks
Thanks for this, I was going a bit end-of-year crazy trying to fix a document with these settings.
Tables
The lesson was concise, easy to follow, and addressed my question completely. Very helpful.
Thanks Nick, that was helpful
Thanks Nick, that was helpful. That fixed one issue but I am still having an issue with the table splitting vertically or, rather, with the table moving right so that half of the table disappears off the right edge of the document when I add enough information to a cell. It appears to hit some unknown threshold that triggers the incident. Any ideas on how to fix this?
Avoiding page splited merged row cell
Thanks for marvelous information site.
The tips how to keep table rows together works nice. Till you have merged cells in a row. If a row containing a merged cell comes in end of the page it can happen that one or more of the un-merged rows stay on the first page. And the rest move to next page.
This did not work for me
I followed the instructions, selecting the + to select table and unchecking the box. No change to the table. Still split across pages. Quit and restarted Word, saved, and reloaded. The box is not checked, but the table is still split across pages.
It works
Thank you Nick.
keeping table rows together
Box is unchecked. Rows are all "keep together". No merged cells. Still splits across pages.
Life Saver
Was working on a tight deadline and was thrilled to find this tip. It worked precisely as I needed it to!!!
1. Select table
2. go to paragraph dialog launcher (small arrow) in the "Home" tab
3. Select "Line and Paragraph Breaks"
4. Select "Keep with Next" so it's a check mark
see http://word.mvps.org/FAQs/TblsFldsFms/KeepTableOn1Page.htm